
This eshop uses cookies to provide services, customize your ads, and analyze your traffic. More information | Accept all cookies Personalise |
| Accept selected cookies |


PROPERTIES:
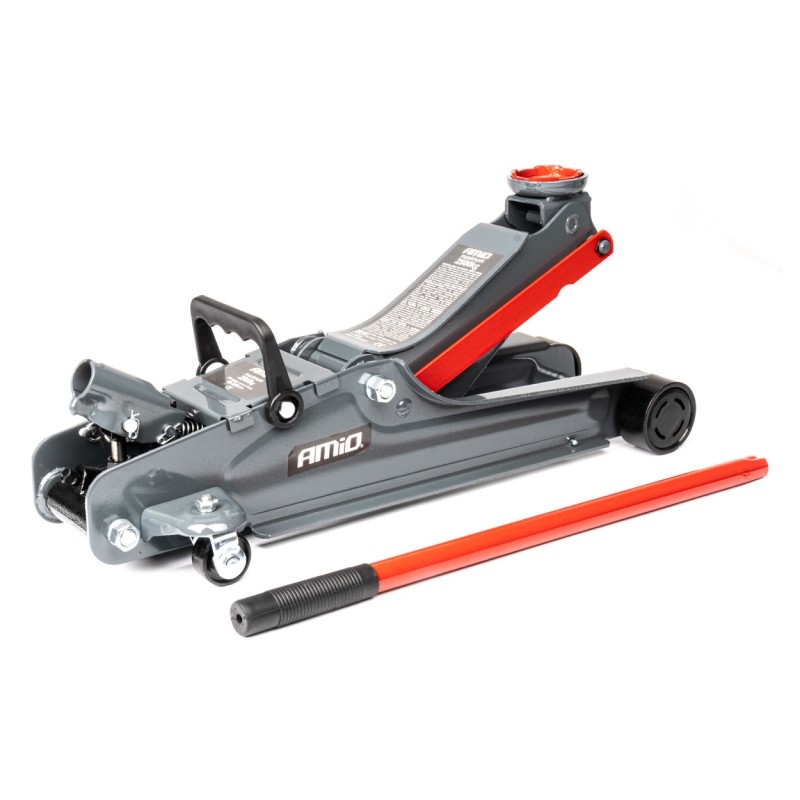
· The low jack profile allows low lift vehicles to be serviced
· Lifting force up to 2,500 kg
· Complies with EN 1494: 2000 + A1: 2008
· It has the following certificates: TUV and CE
· Soft start thanks to the drain valve
· Removable lever for easy storage
· Practical carrying handle
· Four steel wheels (of which two swivel, steering)
TECHNICAL PARAMETERS:
· Maximum load capacity: 2.5 tons
· Lift height: 85 to 375 mm
· Jack weight: 12.5 kg
DIMENSIONS: (L x W x H) style="font-size:14px;font-family:'OpenSans', sans-serif;" />· 510 x 210 x 150 mm
PACKAGE CONTENTS:
· jack
· carrying handle
· lever
· User Manual
Instructions for use
Lifting the vehicle:
1. Make sure the jack and vehicle are on firm, level ground.
2. Always apply the parking brake and lock the wheels.
3. According to the vehicle manual, find the jacking points designated to place the jack and place the jack under that point.
4. Turn the drain valve clockwise to the closed position. Don't drag!
5. To raise the vehicle to the desired position, insert the control rod into the extension and pump up and down. style="font-size:14px;font-family:Roboto,sans-serif;" />6. Place the supports under the chassis in the places designated by the vehicle manufacturer. Do not get under the vehicle unless it is on jack stands. Jacks are not designed for long-term lifting of heavy loads. SLOWLY turn the drain valve counterclockwise to lower the vehicle onto the jack stands.
Starting the vehicle:
1. Turn clockwise to close the drain valve.
2. Pump up the vehicle from the jacks.
3. Remove the supports. Do not stand under the vehicle while lowering the vehicle.
4. Loosen the drain valve by turning it slowly counterclockwise to lower the vehicle to the floor.
Control:
The product should be maintained according to this instruction manual. No modifications should be made to this product.
1. Before each use, a visual inspection of the condition, such as broken welds, damage, bending, missing or damaged parts should be done.
2. Inspection would should be done according to the instructions in this manual.
3. Check for cracked or broken welds, extensive corrosion, loose, damaged, or missing parts.
Maintenance:
Regular monthly maintenance is recommended. Lubrication is very important for jacks because they carry heavy loads. Any dirt such as dust, dirt, etc. can cause slower movement or very serious damage to the internal components. The following procedure is designed for correct operation of the jack.
1. Lubricate the lifting cylinder, threads and pump mechanism with light oil.
2. Visually inspect for cracked welds, bending, damage or loss of parts, or oil leakage.
3. The product should be checked immediately if it has been subjected to excessive load or impact.
4. Once any hydraulic jack is working abnormally, it should be put out of service until it is repaired by an authorized repairer.
5. Keep all surfaces, labels and notices clean.
6. Check the oil level.
7. Check the cylinder every three months that extensive corrosion occurs. Clean it when needed and wipe it with an oil-dampened cloth. When the jack is not in use, it should always be lowered.
Always store your jack in the fully lowered position. This will protect important parts from corrosion. Do not use brake fluid, gear oil or regular motor oil - damage may occur. Always use products designed for hydraulic jacks.
AIR REMOVAL:
1. Turn the drain valve counterclockwise one turn to open.
2. Pump fully eight times.
3. Turn the drain valve clockwise to close.
4. Pump with the rod until the cylinder reaches maximum height and pump several times to remove air from the cylinder.
style="font-size:12pt;font-family:Arial;font-style:italic;">5.Carefully and slowly squeeze the oil filler cap to release trapped air.
6. Turn the drain valve one turn counterclockwise and lower the cylinder to the lowest position. Use force if necessary.
7. Turn drain valve clockwise to closed position and check lift operation. It is possible that the previous procedure will have to be carried out several times to completely release the air.
SERVICE:
In any case where the lifter appears to be damaged, worn, or operating abnormally, it should be taken out of service until repaired by an authorized service center. Use only spare parts authorized by the manufacturer for repair.
Checking the oil condition:
sans-serif;background-color:#ffffff;margin:0pt;font-size:14px;"> 1. Turn the discharge valve counterclockwise to lower the lift cylinder to the down position. This may require pushing with force.
2. Remove the inspection plate.
3. Place the jack on a level surface, remove the filling hole cap. Place the jack in a vertical position with the pole attachment in the down position. The oil should be level with the bottom of the filler hole. If not, add oil. DO NOT OVERFILL. Always fill with new, clean hydraulic oil.
4. Replace the filler cap and inspection plate. 5. Check the operation of the jack.
CAREFULLY READ AND FOLLOW ALL WARNINGS AND INSTRUCTIONS BEFORE OPERATING THE LIFT:
q Do not exceed the permitted CAPACITY.
q The jack is constructed work only on a flat and hard surface.
q The load must be supported by responsible supports immediately after lifting.
q Do not move the vehicle while it is on a jack.
q Lift at the points on the vehicle specified by the manufacturer.
q Only supports and attachments from the manufacturer may be used.
q no changes or modifications may be made to the jack.
q Violation of these warnings may result in damage to the jack and personal injury or property damage.
q Check condition before each use.
Due to the potential hazard associated with improper handling of a product of this type, no changes or modifications should be made to the product without the written consent of the manufacturer or supplier.

Low-profile hydraulic jack 2.5T CE